Collinson Farm
  • Home
  • Family
  • Beehive Bakery
  • Blog
  • CSA Member Updates

Savory Smoked Salmon Scramble

6/23/2016

0 Comments

 
Savory smoked salmon scramle
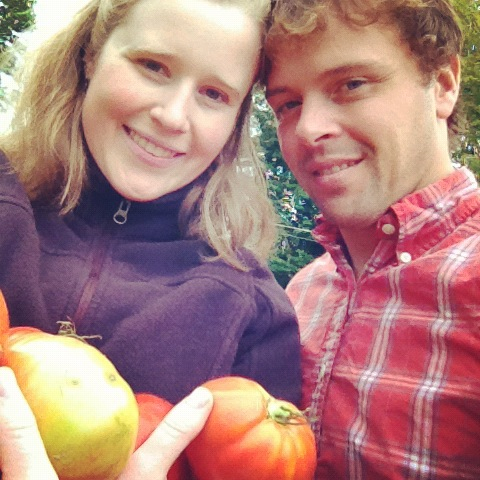
We have been enjoying salads made with our new salad mix greens picked fresh from the garden every day this spring, and the other night we decided to mix things up a bit and use the spinach in a special egg scramble. One of the perks of raising laying hens is always having eggs on hand for a healthy and tasty dinner option. 

To make this dish you can basically throw in any veggies/herbs/cheese you have on hand. The key is to get Ducktrap River smoked salmon trimmings to mix in. Pictured here is a west coast brand of salmon that we picked up at Shaws, but I wouldn't recommend this one as it is full of strange sounding preservatives and colorings. You can find the Ducktrap River brand out of Belfast, Maine, at Hannaford grocery stores. 
Picture
Ingredients

All are to taste
  • Eggs
  • Ducktrap River Smoked Salmon Trimmings
  • Chopped Red Onion
  • Spinach
  • Diced Tomatoes
  • Diced Cheddar Cheese
  • Chives
  • Cilantro
  • Salt
  • Olive Oil

Heat olive oil in pan on medium then add in onions. As they cook, beat eggs in a bowl, adding in a small bit of water. Before the onions are completely soft, add in the spinach. Let the spinach wilt, stirring to mix with the onions. When it has wilted, add in the eggs, chives, cilantro, and salt. Start to scramble the eggs. While they are still a little runny, but before they are set, add in the salmon, cheese, and tomatoes. Continue to scramble until eggs are set. Serve while still warm.
Picture
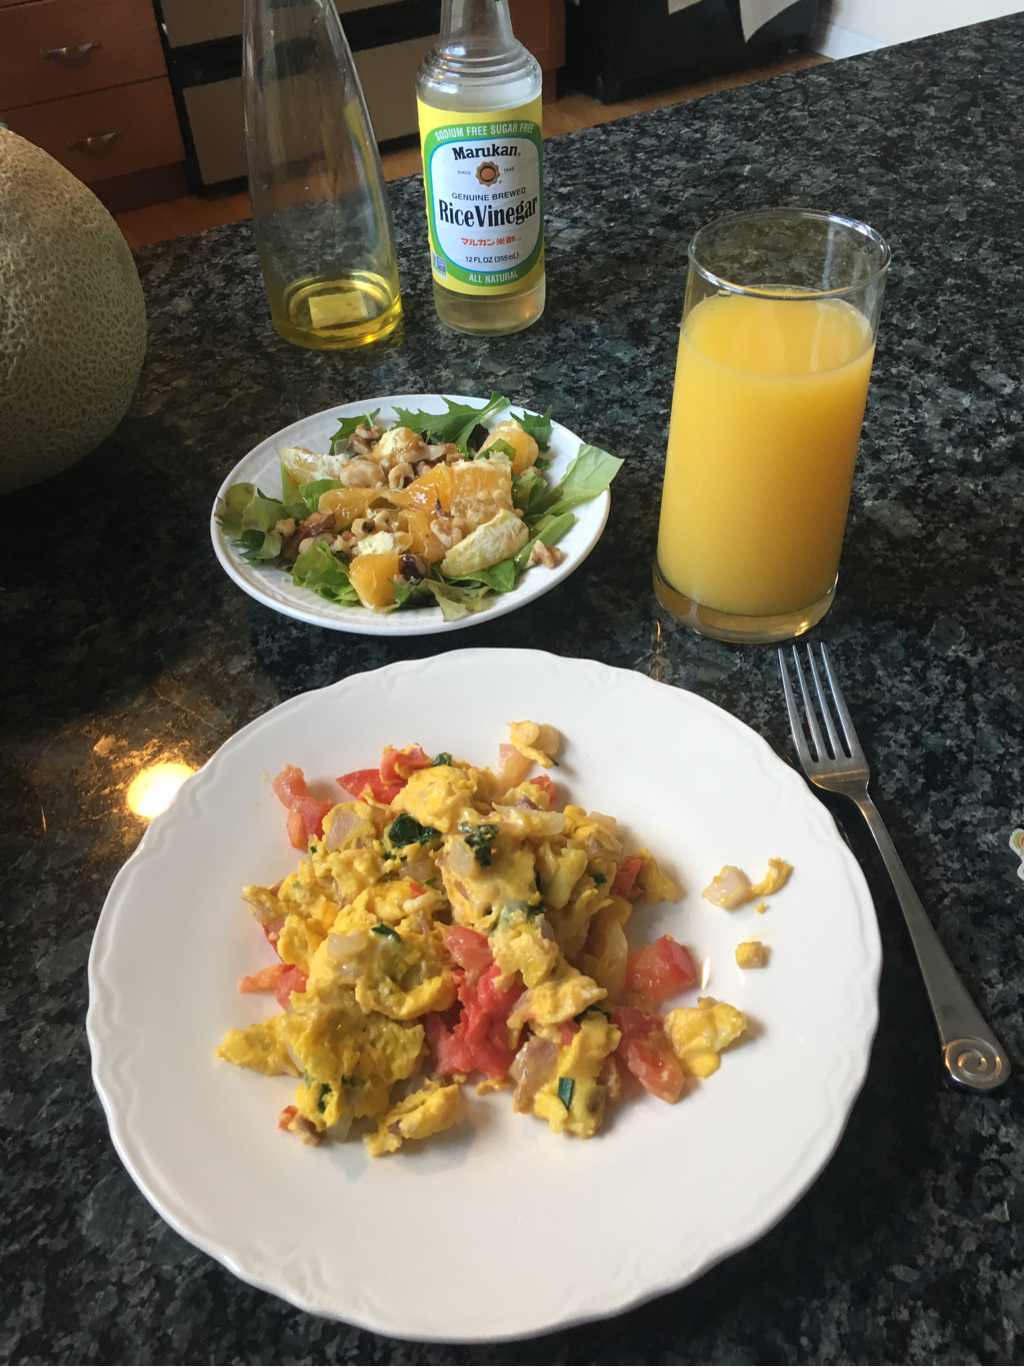
Here we had the Scramble with a side salad with our greens, walnuts, and orange with rice vinegar and olive oil for dressing. Avocado and sunflower seeds are also great additions if you have on hand. We love mixing half orange juice with half seltzer water for a refreshing drink. It makes for a wonderful seasonal meal!
0 Comments

Nettle Tea: Spring Pick-Me-Up

5/11/2015

0 Comments

 
This is written by Margaret- mother and mother in law to Davyd and Jenny. Grandmother to little Gwyn. 
   
It is spring at last!  I am wandering now different paths and looking more closely at what's growing along them, most recently seeing that Stinging Nettle is popping up. You want to be cautious about this spring herb because it - well, stings. You have to have gloves to pick it. 

The early arrival of this herb sets the clue as to its use. In olden times herbal lore was common knowledge. You looked to what first came along for your spring tonics- the feel better after winter cures. In winter the body naturally slows down, yet our life never does. Cold weather shut down is part of our close affinity to the animal kingdom. Essentially we need to curl up by the woodstove fire, or in a man cave den, or somewhere- a lady cave- but we can't!  Not allowed!
 
The best way to snap into action in spring is to put on the gloves and pick nettle.
Nettle plant
Nettle plant
I grow it in my garden because I am rather lazy about trying to figure where it might grow wildly in Maine. In Ireland, Scotland or England it is abundant everywhere, in all pastures and meadows. My father when we hiked over there used to say, Hey Marg, pick those plants!  But I was smart. i first put on gloves. That was in April with the glory of an English spring. Here, I pass it too quickly by because it belongs to the past when Maine was settled by Europeans who brought with them this herb, planting it by kitchen doors which are mostly now in ruins, off in fields, a story of yesteryears. It is harder here to find nettle. 

So- Nettle tea. You can buy it at Robins Flower Pot in Farmington and plant it in your garden. Easy! And then-  With a scissors, gloves on hands, small saucepan, gather nettles, a cup will make a tea.

Nettle Tea Directions:

Once you have this cup of lovely green stinging leaves, pour two cups of water over it in the saucepan. Bring to a boil over your stove. Turn off heat, let stand for a few minutes, strain out leaves and put liquid into cup. Flavour with honey. 

I like honey in my tea. This herb is full of minerals for getting your body back into gear. Sip slowly. If you demand another cup, follow the same process. One cup fresh herb to two cups of water, bring to boil, turn off heat, Enjoy. 

I will try to share with you the restorative properties of all the different herbs. This will inspire me to also follow my own advice. I once studied herbalism at the Emerson College of Herbology in Montreal. And, I grew up with a family that used all natural remedies - never an artificial one. Well, rarely. There were exceptions. I was a tomboy. I was a kid who jumped into ice water streams and caught pneumonia very easily, sick for weeks with a prescribed drug from the neighbor doctor who convinced Mama I had to have it. but I knew that I would have made it without it. 

My bedroom in our old farmhouse was high up on the third floor, tiny, but there i read during being sick to my heart's content. Then up would come Dr. Berkowitz followed by Mama and Dado, and the three saying, take your medicine, you have to get back to school.  I was maybe twelve years old when I started swimming early in the creeks the end of March.  

Nettle tea as a spring remedy. And closely followed by violet tea. Mama would bring up the herbs once the good doc descended the staircase.  

Drink your tea!   See you soon!   MBCollinson
0 Comments

Getting Through The Winter In Maine

4/16/2015

0 Comments

 
And I'm not just talking about food.

I'm talking about the mental toughness you need to call yourself a true Mainer.

Because by February, every person north of Kennebunkport, or what we call "northern Massachusetts," is ready to throw in the towel. I'm sure if you checked Google Analytics you would see a spike in searches for real estate in Florida coming from Maine IP addresses during the first three months of the year. Every year I vow I'm going to move away, at least for the winter months, every year.

And then August rolls around and it's been so hot that the thought of crystal clear icy cold air is appealing.

Until February comes around again, and it's back to self-hatred for allowing yourself to be subjected to this frigid cold for this long a time period.

Our lambs were born in the depths of it. The first two Collinson lambs came on Valentines Day in the middle of blizzard Neptune. Hence we named them Neptune and Romeo. Luckily, being the experienced farmers that we are, the lambs just appeared between periods of checking on the mamas. We brought each one in to the basement to warm it up, but then felt horrible returning them to their mom in the below zero barn. We gave her and her babies a heat lamp, which seemed to throw as much heat as a 15 watt exposed light bulb.
Picture
Myself with newborn Neptune and Davyd with baby Romeo.

Here's how we kept tabs on the babies, our very own "Lamb Cam";

The third lamb, Chocolate, was born two days later as Neptune was still raging. We stole the second heat lamp from the chickens. There were many nights I have gone to bed distressing over the hens, thinking of them huddling together in their coop trying to keep warm as the temps plummeted into the night. They are all still alive, but have that ragged shell-shocked look. I think once we start to see green grass they'll spring back. 

Similar to their human fellow farm inhabitants.

Picture
Proud mama Bella nuzzling Davyd and baby Chocolate
What has kept the animals most comfortable throughout this snowy freezing winter has been their deep bedding. This is a technique where you layer hay in their stalls or pen that creates a very thick layer of insulation below them. The sheep stalls have about two feet of hay under the lambs, and the chicken bedding is up to about a foot. Then there is around eight feet of snow insulating the outside of the barn. Between this insulation and their wool and down coats, they are able to withstand the temperatures, although I can't imagine it's very comfortable.

Picture
How Hobbes the cat gets through the cold winter
We humans are fortunate to have two wood stoves going round the clock. It keeps the house cozy, but does provide a stark contrast when you have to go outside and clean stalls, feed the animals their hay and grain, and chop up all the frozen water buckets multiple times a day. And then load wood from the barn and bring in enough to get through the evening and next day. I don't know how Davyd does it. In and out, in and out. He is out for hours at a time tending to the animals or getting us more wood.

So why do we live here again? In this freezing tundra that makes it hard to breath outside for months upon months. In a place where you do a little inner happy dance when you see the temperature on your drive to work is on the plus side of zero. Where you can't access your front yard without becoming a snowy mountain climber destined to get stuck from your waist down while trying to fill the bird feeders. 
We live here because we're Mainers. Many of us have tried living other sunnier places, and yet always end up back here. There's something magical about living in a place where change is guaranteed. Yes, the snow is going to pile up above your head. Yes, you are going to have to take microwaved corn cozies to bed for about half the year. 

But then this amazing thing happens where one day you go outside and can't believe that the snow has almost disappeared. You can pack away your ankle-length down coat into the storage closet. You can enjoy your first meal on the deck you knew was out there somewhere. You can re-acquaint yourself with the space known as the outdoors.

And it's wonderful. Absolutely wonderful. You have made it through the depths of winter and are rewarded with the most refreshing spring that you can remember.

Gwyn is happy to be outdoors greeting the chickens on a fresh spring morning.
0 Comments

Auntie Lisa's Crust Recipe, for Savory & Sweet Pies

1/27/2015

0 Comments

 
Picture
Savory pie crusts, ready to be filled with the egg mixture
I have been making quiches regularly since we started raising hens. I will confide that I used store-bought ready-made crusts for all these quiches until recently.

My sister Lisa was visiting for the holidays and I had planned to make quiche for dinner one night. Only to my dismay, we had used the store-bought crust to make some yummy blueberry pies. 

Let me clarify, Davyd made the pies. He is the master baker of delicious sweet pies. 

Laughing, Lisa said she would "whip up some crust from scratch, it only takes 15 minutes." 

Crust from scratch?? In 15 minutes?? I didn't believe her. Timeframes have never been my sister's strong suit. "Sure, we'll just hop on this train from Florence to Napoli en route to Sorento and it will all be fine!" A few hours later, we're stuck in a Burger King located in the Napoli train station at night, which is located on the wrong side of town...

She whipped up the crust that evening, but with all the holiday activity going on around us, I had no idea how long the crust actually took her. But one bite into the finished quiche, and I was hooked. It had just the right amount of salt and was flaky and amazing.

I made her record her recipe in my personal recipe book. This recipe book was given to me by a close college friend, Rachel Potter, who took the time to write it and then ship it to me in Hamburg, Germany, where I was doing my junior year abroad in college. And had never cooked for myself in my life. 

Rachel wrote an intro, and then sections on Essential Tools, On-Hand Ingredients, A Note On Meat, Organization, Ten Dorm Dinners, and how to record recipes. I owe any culinary prowess I have achieved to Rachel Potter.
Picture
The title page, On-Hand Ingredients section, and page describing how to record recipes.
Into this book went the pie crust recipe from Lisa;

Pie Crust - EASY!

Time: 15 minutes
Yield: Dough for 9-9 1/2" pie plate

1.5 cups flour
1/4 tsp fine salt
1 tsp granulated sugar (for sweet pies only)
8 tbsp cold unsalted butter (1 stick), cut into small pieces
4-5+ tbsp (1/4 cup) ice water

Combine flour, salt, and sugar in a bowl and aerate with a fork. Using a pastry blender or your fingers, cut the butter into the dry ingredients until they have mixed--will be a bit clumpy.

Drizzle 4 tbsp cold water over mixture and mix just until the dough comes together. Add the extra tbsp water if necessary, but don't overwork. The dough is ready! 

You can cover in plastic wrap for 30 minutes if you want to or roll out and use right now. Enjoy! Cook your pie according to the filling directions.

Source: Chow.com and Lisa, January 1, 2015

I found I had to add a bit more ice water, and work with the dough more than I was planning on to get it to a point where I could roll it out. But once it was rolled and baked, viola! Perfect crust once again! So I would concede that it took more around 20 minutes, but who's counting? 

Jenny
Picture
Savory quiche, ready to go into the oven
0 Comments

Starting a Root Cellar Under The Barn

1/18/2015

2 Comments

 
Picture
We have had a productive garden for three years now. Each year has seen slight variations in the size of the garden, its appearance and general makeup. Each fall we have gathered up the cold weather crops grown that year and scampered for ideas and ways to keep some of the produce into the cold winter months.

The first year we tried storing our carrots in a cooler mixed with dirt in the barn. Our barn was too cold to keep them all from freezing and we lost that crop.
Picture
Our first year crop of carrots before the freezing temps got them.
The next year we used our basement bulkhead, piling the carrots, potatoes and beets we had grown that year into five gallons buckets layered with peat moss. We then placed the buckets on the steps of the bulkhead. 

This worked quite well, actually, as the heat from the basement woodstove warmed the bulkhead just enough to keep it above freezing and the snow insulated the bulkhead from above. 

But then we had a January thaw, which took away most of the snow, and then a deep freeze, which brought the bulkhead below freezing (about 25F at the coldest time). This was enough to put many of the carrots through a freeze and thaw cycle that ruined their freshness. We still had some, well quite a few, to use. But the novelty of having a simple solution for our winter storage had worn off. Plus, I knew all along that the bulkhead just was not a large enough area if we ever wanted to increase our production. 
Davyd and the beetsHere I am with the beets that made it through our second winter in the bulkhead.
We have this very neat little area underneath our barn. Because our barn is built on a natural slope there is a cavity underneath the main floor that gets larger as one works their way toward the northern side. There is a little door on the north side of the barn, put there for access to support pillars and beams underneath. Through it you can enter into this little area and see the substructure of the barn. 

It isn’t a basement, but along the north side there is about five feet of head room, which decreases as you move to the other side of the barn, until about halfway across there is only about three feet to work with. I had always imaged this area as a possible cold storage/winter storage area (i.e root cellar). 

When I had first gone into this area in the summer of 2012, I noticed how much cooler it was compared to the temperature outside. This made me think about digging out a 10’x12’ or so area at about 6 feet high ( I am 5’7” so I don’t need more), putting in framed and insulated walls, and seeing if this might just serve as a permanent place to store our vegetables – both in summer when we need a cold room for freshly picked veggies and in winter when we need to store all the wonderful cold hardy crops.

However, as anything in farming, a thought is just a thought until you take action. This fall I set out digging. With shovel, pickax, pry-bar and wheelbarrow I picked away at the dirt and rocks in my way. Thankfully, I have a pole barn adjacent to the backside (northern side) of the barn – about 40 feet away- that is built on the same natural slope as the main barn, except there is no level floor in the pole barn. It just has a dirt floor that drops about three feet from side to side. This setup allowed me to fill the wheelbarrow under the main barn, push it downhill to the pole barn and then dump it on the lower side of dirt floor, thus slowly creating a level surface. 

I did this goodness knows how many times. I also built a base support wall on two sides of the pole barn from rough timber gathered from the woods, interlocking them in a kind of log cabin style so as to support  each other and, most importantly, the dirt I was putting down. 

I didn’t expect to also have to pry out huge fieldstones that must have been part of the original barn foundation hidden underneath the surface of the ground. I pulled out about ten of these stones, some larger, some smaller. I think the largest one was about five-hundred pounds, the smallest just around one-hundred pounds. Talk about a workout!

Picture
Some of the final field stones removed

We are at a point now where I have finally finished digging out the area, leveling the ground (and the pole barn), and have started framing and insulating. It has taken me two efforts, spread out over two years, to do this. I had stopped my original effort because I was partially satisfied with the bulkhead as a storage option. I go by the creed that most often the simplest solution is best, as long as it is effective. But knowing this year that I was bound to again lose produce I otherwise could have kept and used, I started up again. More importantly, we do now plan to expand and grow our vegetable plots. We will need a cold storage place for freshly picked produce before it is delivered to market. This root cellar will serve as the perfect solution. 

The root cellar itself will not be energy free. We are using the energy of the ground both as an air conditioner (for lack of a better term) in summer and insulator in winter. Conveniently this area has two small windows that allow in light, circulate air, and can also hold an AC unit, which can be tricked into regulating the air temperature below a typical range. In winter a heater of some kind (I haven’t decided which kind yet) can also be used for the same purpose, to keep temperatures at or above freezing. Again, it is the ground, the insulated walls and ceiling that will be doing the bulk of the temperature control, the AC unit and heater should do the rest.. It will be interesting to actually see how much, but that is the idea. 

Picture
Looking in from the door straight ahead, and looking toward the south and north walls with windows. I also unearthed what I believe is the water line to the barn.

A root cellar can come in many shapes and forms. The first one I ever saw was at a farm my family and I lived on in Triform, New York. My boyhood friend Marcus showed it to me one day – I had no idea it was there. It was a square hole dug straight down into the ground about fifteen feet.  There was a little hanging light at the top one could turn on to see, and a ladder down into the center of the cellar that Marcus and I climbed down. At seven years old this was like entering into a newly discovered underground world. It was cool, slightly damp and dark, except for the dim yellow light from above. There was a dirt floor and wooden shelves and wooden barrels with vegetables in them. I can’t remember what type, but everything clicked immediately in my mind when we were down there. What an amazing place to store food! 

I have helped, along with many others, build another root cellar with a friend of mine, Sam Systma and his wife Jess, much later in life. This one had a slightly different design – it was built into the side of a small hill, much like mine, but then covered in dirt once the structure had been built. It was beautifully designed and worked brilliantly. I expected no less from Sam and Jess. If you have ever heard them play their instruments together, or sing, you would know what I mean. 

I am hoping our new root cellar will work nearly as well. I will update the progress of the root cellar as it nears completion. We should have ours working by the spring. Root cellars are an efficient and cost-effective way to store vegetables both short and long term. They are not at all complicated to build. You just have to be willing to do the work. Now that the heavy lifting is complete there are walls to finish, a trap door to build that will grant access to the main floor of the barn during the winter, an electric line to run, and a few other things I am sure. It is always a treat to marvel in the completed work. I hope to this summer when I see cool fresh greens in wooden crates sitting in the root cellar waiting to be delivered to market. 

Davyd

Picture
Here I am standing in the completed dug out space. Next up - walls and insulation.
2 Comments

A Unique & Delicious Source of Winter Vitamin C

12/6/2014

1 Comment

 
Picture
Summer blackberries continue to provide an excellent source of vitamin C when eaten as jam in the winter.
Wondering how to get enough vitamin C this winter to help stave off colds and stuffy noses? 

A jar of Beehive Bakery's blackberry jam might do just the trick. Blackberries are one of nature's high-powered fruits that pack a punch of bioflavonoids and half your recommended daily amount of vitamin C per cup. They also have some of the highest antioxidant levels of all fruits. (See the Huffington Post article, "Blackberry Facts: 10 Things You May Not Know About the Fruit".) This particular jam is made with organically grown blackberries that were picked and processed when they were fresh and at their peak of late summer sweetness from the Collinson garden. It's a tasty way to help get your daily dose of C.

Aside from eating the jam by the spoonful directly from the jar, Margaret Collinson suggests many more creative ways to consume.

She suggests using it traditionally on toast, scones, and muffins. Or, trying one of the below:

Cereals
Add to oatmeal in the morning. A good start to the day. 

Cocktails
Add 1 tsp of jam to 4 ounces of sparkling wine or seltzer water. Put jam into a glass, pour in drink, whisk and stir well. At a party, put out several jam varieties with spoons to stir. Invite friends to make their own drinks. 

Hot Tea
We all love hot beverages during the long winter months. Simply stir 2 tsp of blackberry jam into a mug of hot black tea. You will love how this flavors your tea. Heightens your energy to get out and ski! Or snowshoe! Enjoy! 
Meat
Use it for a grilling glaze on meats – chicken or ribs. Place a dab alongside your roasted or braised meats as you would cranberry sauce. 

Sandwiches
Put blackberry jam in ham and cheese or turkey and cheese sandwiches. You’d be surprised how good this is. 

Shortbread
Blackberry jam can be used deliciously in a shortbread base for dessert.

Smoothies, Yogurt & Milkshakes
Add as much as you wish to these. We put it on top of yogurt, then swirl it in. Everyone has their own sweet demand. I love my yogurt as dark as the berry, which means, very sweet.


Picture
Many people don't realize a cup of blackberries supply half of one's daily dose of vitamin C!
How to order: Blackberry Jam comes as part of the Bramble Fruits set, or you could order a set of 4 of just Blackberry Jam by ordering the "You choose 4" product.

Happy and healthy eating!
Order Jam
1 Comment

Gardener's Beet Soup

11/22/2014

0 Comments

 
It all started in Bath, England with a bunch of three beets still covered in fresh garden dirt.

Davyd and my sister Lisa and I were living in Bath all pursuing our Master's degrees. In England, you can get your degree in one year, so the three of us packed up what we would need for twelve months, and moved into a cozy third floor Georgian mansion flat. It was centrally located in Bath on the Avon Canal and looked out toward the hills where sheep and cows grazed.
Picture
Southbourne Mansion in Bath. Our flat was the four windows to the left of the arrow.
 It's amazing that in a city of 80,000+ people that there were numerous fields with livestock overlooking the city. 
Picture
Very lucky cows who get to graze on one of the hills overlooking the city of Bath.
As we were students, we did not have a garden. Locals rented garden plots around the city, but we were not there long enough to be able to get on the waiting list. We did, however, have British friends, Nick and Maureen, in nearby Bathford. They owned a quaint cottage and had a lovely garden. 
Picture
Maureen and Nick at their home in Bathford.
One day Maureen gave us a present of three of her freshly picked beets. We had no idea what to do with them. None of us particularly liked beets. But we were not about to waste such a sweet gift. 

We all participated in food shopping and cooking meals, and it was not long before each of our individual cooking skills began to take shape. My sister had a knack for baking everything from cookies to savory pies, such as her onion, cheese, and tomato specialty pie. Davyd was the master of cooking meat. And I was the queen of making soups. 

I soon came across a recipe for beet soup from a blog called Mediterranean Cooking in Alaska. To this day, if you just Google "beet soup moose" it will be the first result. I had negative associations with "borsch," but this soup looked delicious. It had bacon, and you served it with a dollop of sour cream. I decided you couldn't go wrong. 

We roasted the beets drizzled in olive oil in our microwave/oven. This contraption, by coincidence, hung above the washer/dryer all-in-one machine.
Picture
You can see the microwave/oven to the right of the window. Below it, behind a wooden door, is the washer/dryer machine. This shot was taken the day we left.
Then we chopped vegetables from the nearby Southgate outdoor market, cooked up some bacon, and made the most delicious soup I have ever tasted. Served with a dollop of sour cream and sprinkled with dil, it is one of the nicest hardy soups you will ever try. Your body feels as though you are giving it a hug with all the nutrients you are consuming.
Picture
The first batch of beet soup.
Now that we have our own garden, this year I decided to make an epic batch of beet soup. I had purchased a 20 quart saucepan for Davyd for his birthday, which came in handy for this batch. Most everything still in our garden in October went into it. Beets, cabbage, yellow carrots, onions, kale. And I now have an immersion blender, which gives the soup a more processed, blended consistency. This also makes for easy freezing.
Picture
The epic beet soup of 2014
The lovely part of beet soup is that you can add anything from your garden to it, and it will always turn out tasty and nutritious. For the best taste, I highly recommend the bacon and adding red wine. However, if you are vegetarian, the soup can be made without the bacon. Just saute the vegetables in olive oil. Here is my recipe, slightly altered from the original on the Mediterranean Cooking in Alaska blog,

Gardener's Beet Soup

Serves 6
  • 1 cup diced bacon
  • 1 cup diced parsnips
  • 1 cup diced carrots
  • Chopped kale to taste
  • Chopped cabbage to taste
  • Chopped spinach to taste
  • 1 cup red wine, or to taste
  • 1 1/2 cups diced celery
  • 1 1/2 cups diced onions
  • 2 Tbsp. minced garlic
  • 6 cups vegetable or beef stock
  • 1 14.5 ounce can diced or crushed tomatoes
  • 1/4 cup ketchup
  • 4 medium-sized beets, roasted and diced
  • 1 1/2 cups finely shredded cabbage
  • Sour cream
  • Minced dill


Step 1: Roast the beets

Note: This can be done beforehand, as they can keep in the refrigerator for about a week. 
Preheat the oven to 400°F. Wash the beets, cut off the greens leaving an inch of stem (don't cut into the beet itself), rub the beets with olive oil, and wrap tightly in a foil packet. Bake for 40 minutes to 1 1/2 hours, depending on the size of the beets and how fresh they are. The beets are done when they're tender if poked with a knife or skewer. Let the beets cool, and slip off their skins.

Step 2: Make the soup

Sauté the bacon in a Dutch oven until the fat has rendered and the bacon begins to brown. Add the parsnips, carrots, celery, and onions, and sauté until the onion softens. Add the garlic and cook for one minute. Stir in the stock, tomatoes, ketchup, wine, beets, cabbage, kale, and spinach. Bring to a boil, cover, turn down the heat to low, and simmer for 30 minutes. Uncover and cook for 10 minutes, or until the vegetables are cooked through and the broth is flavorful. 

Serve the soup immediately, topped with a dollop of sour cream and minced fresh dill.

You can also choose to let the soup cool, and then freeze it in small batches for an easy winter dinner.

0 Comments

Apple Season, Fall in Maine

9/30/2014

0 Comments

 
Picture
Baby Gwyn samples the harvest
After an exceptionally hot weekend, the air reverted back to its crisp state. Finding a free half hour before dinner, Davyd, Gwyn and I headed out back to collect apples.


How do we get them out of the trees?

Davyd is pretty talented at getting them down.

Then comes the fun of collecting them. Bumped, bruised, and with insect inhabitants? No problem! The unsavory bits will be removed in processing.

Picture

These apples will be used to make delicious applesauce. Except for the mostly-blemish free ones, those will be eating apples.

Can't wait for the potatoe pancakes & applesauce this winter!

Picture
0 Comments

Collinson Farm Welcomes 4 Katahdin Ewes & 1 Katahdin Ram

9/29/2014

0 Comments

 
Picture
Maple May Fiona, Sophia, Eldred, and Bella. Rusty not pictured.
The month began with us saying goodbye to our roosters and is ending with us welcoming five new residents to the farm.

Rusty, Bella, Eldred, Maple May Fiona, and Sophia have taken up residence in the barn. 

They are Katahdin breed sheep, which is a hair breed. This means that instead of having wool coats, they have hair coats. They don't need to be sheared in the spring, instead they shed.

We purchased these Katahdins as breeding stock to start our own larger flock. We plan to then sell future lambs as breeding stock, as well as offer lamb meat. Our neighbors raise two sheep per year in their field and share the most delicious lamb stews with us in the winter. Hopefully we can do the same in future winters.

What do sheep need you ask? They need a cozy sleeping quarters with either hay or shavings to sleep on. Each night they get fresh hay to eat as well as a tiny bit of grain. You can't feed sheep too much grain, or they get the runs. We think of the grain as sheep dessert. They also always need fresh water, and enjoy a salt lick in their stalls.

During the day we put them out to pasture in the back fields. We have electric netting fencing that runs from the barn door all the way out to the fields, where there are two sections for them to graze. Rusty and Bella are in one section, and Eldred, Maple May Fiona, and Sophia are in the other. Maple May Fiona and Sophia are the youngest, not yet a year old, so they cannot be in the same space with the ram. 

It is very important to also always have fresh water available for the herd during the day. Davyd lugs up buckets from our spring-fed stream for them.

Now that we have sheep, our eight-year-old neighbor has decided we are bona-fide official farmers. "You have two animals now, so that makes you real farmers" she told us. We're pretty excited to be considered bona-fide. 
0 Comments

Goodbye Roosters, Hello freezer full of chicken

9/3/2014

1 Comment

 
Picture
Today was the day.

Last night Davyd and Jonathan loaded up the roosters into a container Davyd had constructed from chicken wire and two by fours. This morning he hopped in his truck, roosters covered in the truck bed, and drove off to Greene.

Normally we have our chickens processed in West Gardiner, which is right next door. This year though they were booked until December! Raising chickens must be really taking off here in Maine.

This evening Davyd stopped at home, unloaded the empty chicken wire box, and re-loaded the truck bed with a cooler and empty box. Then back in the truck he went to Greene and returned home a little over an hour later with a bed full of nicely individually packaged birds.

Baby Gwyn and I helped him lug them down to the basement, and into the freezer they went, one by one. Davyd checked the weight listed on each bag and tried to guess which bird it had been.

While he was gone, Gwyn and I were swinging in the hammock beside the stream reading Peekaboo Baby and Sophie's Busy Day. We could hear one rooster crowing back near the garden and one out in the field. Davyd decided to keep these two in hopes of being able to hatch our own chicks. The crowing sounded sad and forlorn. The two roosters were definitely looking for the rest of their flock.

One of the roosters we kept we call Elvis. He has gray and black feathers that go all the way down his legs and look like Elvis-style bell bottoms. He is also a prolific crower. He has an Elvis-lookalike female partner who we also kept. In our batch of heirloom roosters, we did end up with one or two hens. These three birds got re-located to the pole barn with the rest of the hens last night. They seem to be settling in, but we did have to trek out to the field to bring in Elvis tonight. There he was, sitting all alone in the rooster house waiting to be put to bed.

The other rooster whose life was spared was Lancelot. Margaret nursed him back to health the day he arrived in the mail as a baby chick. She held him close to her skin most of the day to keep him warm. She couldn't bear to send him to the processor. Davyd's sister Claire offered to take him in with her flock in Farmington and he is now happily living with them.

We knew this day had to come, but I must admit that it was emotional heading out to the field this evening to get Elvis and seeing the empty rooster house. 

It probably won't hurt so much eating delicious free range chicken all winter.
1 Comment
<<Previous

    The Collinsons

    Davyd, Jenny, & baby Gwyn believe in fresh air, fresh food, and fresh perspectives.

    Archives

    June 2016
    May 2015
    April 2015
    January 2015
    December 2014
    November 2014
    September 2014
    November 2013

    Categories

    All

    RSS Feed

The Collinson Family

Picture
Collinson Farm
Beehive Bakery

Litchfield, Maine
Farmington, Maine
collinsonfarm@outlook.com

Sign Up for Farm Updates

* indicates required